LED (Light Emitting Diode) Lighting is a wonderful innovation for boating due to their low power draw, low heat output and compact size. The technology has progressed to where LED lighting can be very bright and are becoming common place for navigation & spreader lights.
The characteristics above also make LED lighting very attractive for accessory lighting on your boat. LEDs for this purpose are available in a variety of packaging options, but one economical and very flexible way to utilize LEDs is to integrate LED strips into your boat for a variety of lighting purposes.
(click "Read More" to the right for more of this article)
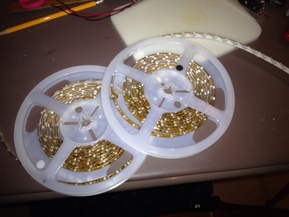
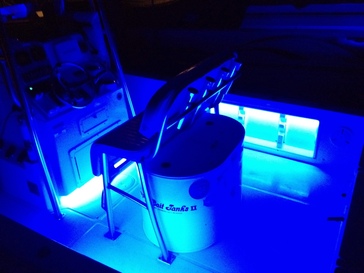
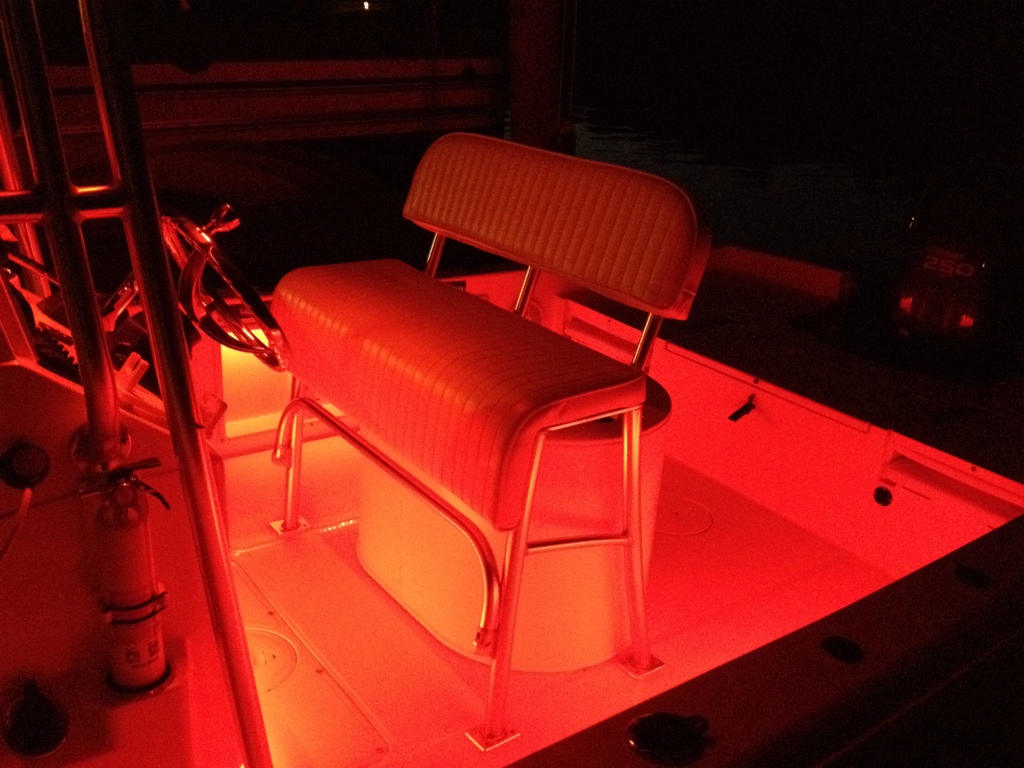
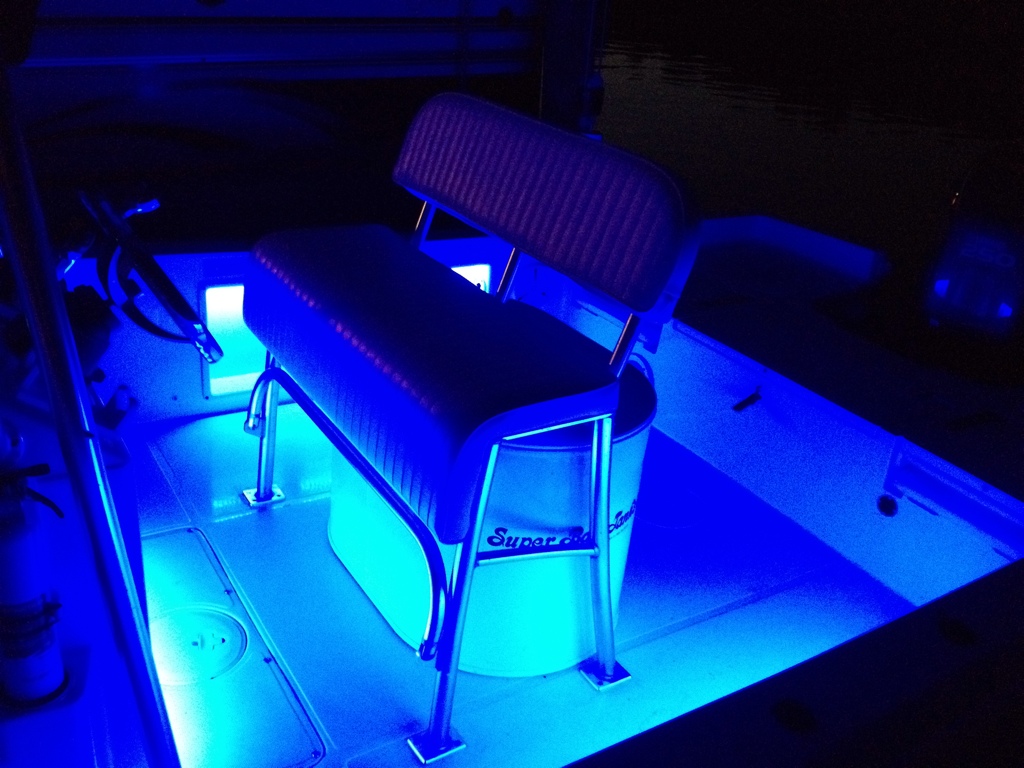
Over this past winter when I was taking on an overall wiring & "toy" upgrade on my boat, I decided to add some LED lighting to my rod-holder gunnel inserts as well as in a few other locations for accessory lighting. I purchased a 16' roll each of red & blue LEDs from an Internet vendor - red for night fishing purposes and blue for the "it's just cool" factor. When purchasing LED strips, ensure you are purchasing strips that are "waterproof" - typically IP65 rated or better. These will have some form of coating over the strip and the components - typically a silicon type material. Non-waterpoof strips have the flexible circuit board and the electronic components exposed and would not be suitable for use on a boat which is exposed to the elements.
In addition to single color options, LED tape lights are available in RGB strips which, through the use of a controller, can be programmed to display one of many different colors. I could have gone with these RGB strips from one of various sources, but at the time I was trying to manage the cash outlay since I had just picked several new "toys" for the boat, not to mention it was the Holiday's itself, and ultimately I did not have a strong desire for more color options (though my daughter may have enjoyed a pink option).
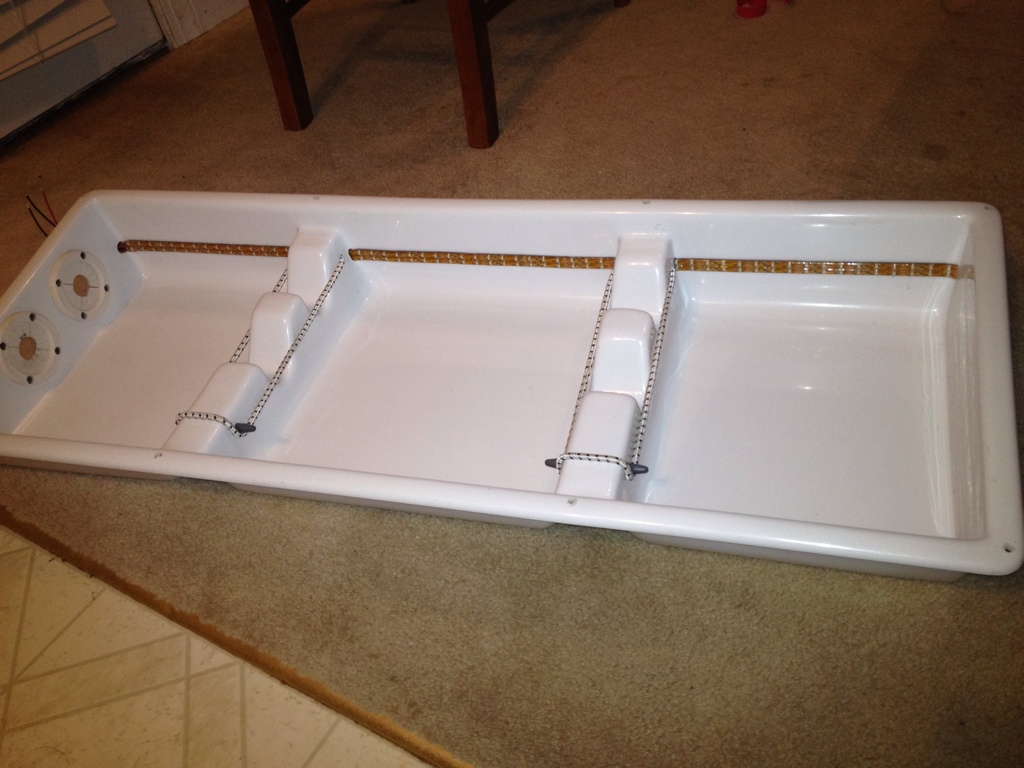
I decided to mount the lights 2.25" from the outer edge of the gunnel insert, which is about 1/2 way front-to-back. I did a test run and with the insert installed on the boat you could not see the light strips unless you laid down on the deck, and I figured given the angle on the LED this would give a nice, even wash effect across the deck.
In addition to single color options, LED tape lights are available in RGB strips which, through the use of a controller, can be programmed to display one of many different colors. I could have gone with these RGB strips from one of various sources, but at the time I was trying to manage the cash outlay since I had just picked several new "toys" for the boat, not to mention it was the Holiday's itself, and ultimately I did not have a strong desire for more color options (though my daughter may have enjoyed a pink option).
I decided to mount the lights 2.25" from the outer edge of the gunnel insert, which is about 1/2 way front-to-back. I did a test run and with the insert installed on the boat you could not see the light strips unless you laid down on the deck, and I figured given the angle on the LED this would give a nice, even wash effect across the deck.
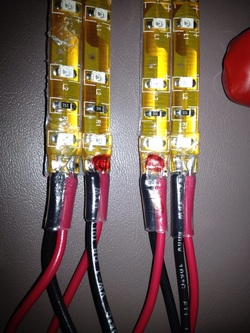
I trimmed the ends of the gel protective coating and soldered on some 20 ga wire leads that I'll then use to connect to my lighting circuit in the boat. I decided I'd "tap" these into a common circuit I'll run for the lighting, vs running the strips in series, daisy chaining them around the boat - I was not clear how much I could run in series and having wires just on one end of the strips will make it easier to deal with when I need to remove the gunnel inserts in the future.
One of my friends had picked up a roll of these lights for his Hurricane deck boat upon my recommendation and had them installed by someone along with some other gear. He mentioned to me that the 3M double-stick tape that is on the strips was not doing a great holding the lights on as were are coming off in some places from time to time - this could be due to the installer not cleaning the surface well, or maybe handling the tape, or just the irregularity of the mounting service. However, I figured I would use a little extra insurance and I picked up a roll of 3M outdoor double-stick tape at Home Depot. Its about 3/4" or 1" wide, has red protecting tape on it and maybe and 1/8" thick. I laid this out and then adhered the LED tape (after removing the protective covering for the double-stick tape that came on it) to the outdoor double-stick tape - and put the two strips side-by-side, and trimmed off the remaining. The outdoor tape was wide enough that I could put one additional LED strip next to it had I wanted - sort of wish I had gotten a white strip now as well.
One of my friends had picked up a roll of these lights for his Hurricane deck boat upon my recommendation and had them installed by someone along with some other gear. He mentioned to me that the 3M double-stick tape that is on the strips was not doing a great holding the lights on as were are coming off in some places from time to time - this could be due to the installer not cleaning the surface well, or maybe handling the tape, or just the irregularity of the mounting service. However, I figured I would use a little extra insurance and I picked up a roll of 3M outdoor double-stick tape at Home Depot. Its about 3/4" or 1" wide, has red protecting tape on it and maybe and 1/8" thick. I laid this out and then adhered the LED tape (after removing the protective covering for the double-stick tape that came on it) to the outdoor double-stick tape - and put the two strips side-by-side, and trimmed off the remaining. The outdoor tape was wide enough that I could put one additional LED strip next to it had I wanted - sort of wish I had gotten a white strip now as well.
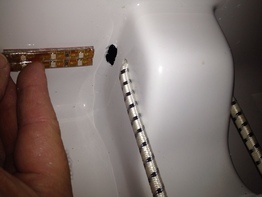
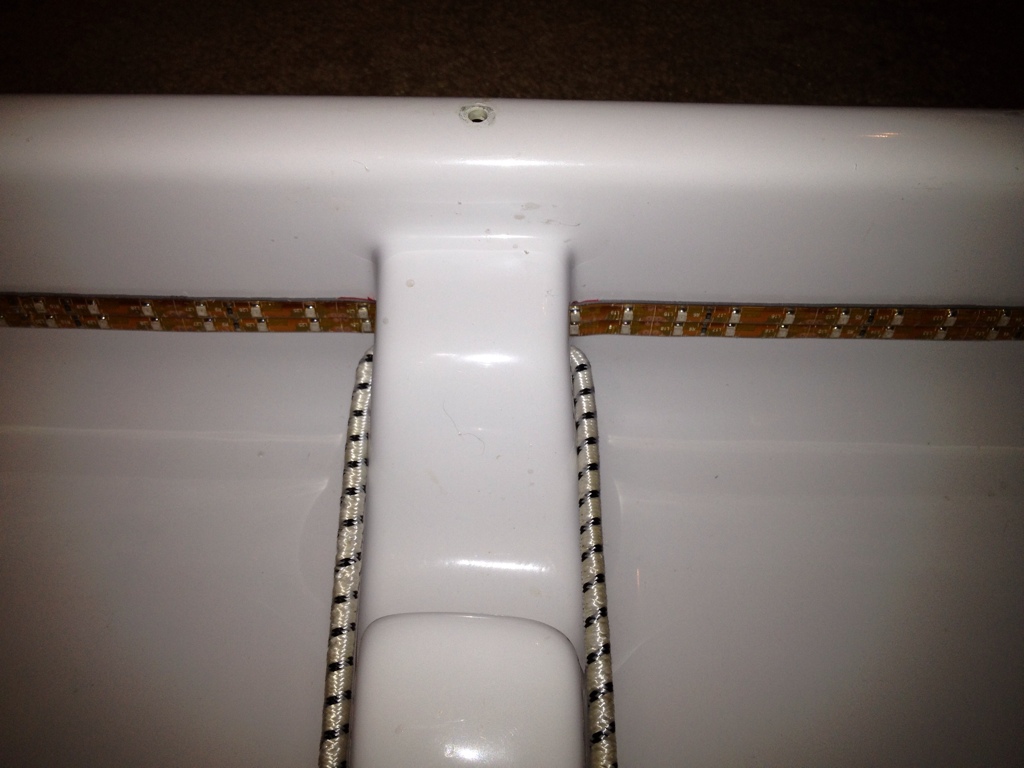
My insert has molded rod racks and I did not want to go through the hassle of cutting a strip into three pieces and having to connect the wiring at each spot, so I took the advice of someone else here on THT and used my handy Dremel to route out a hole large enough for the strip to pass through at each of the points where the rod rack came down. Pulled the strips through, pulled off the protective backing and stuck on the strips nice and straight. Having the two strips on a single piece of thicker foam-based double-stick tape helped get a nice straight install without any real hassles. A little white outdoor caulk at each of the cut-outs and the inserts are ready to be wired.
 |  |
When wiring, I used quality tinned, stranded marine wiring (the ONLY type you should ever use on a boat), and while the LEDs pull very little current and the load calculations would result in a fairly small gauge wire, it is recommended to always use at least 16 ga wire on a boat for anything other than very short runs immediately at the equipment due to the potential for smaller wire to break due to vibrations that occur in the marine / boating environment.
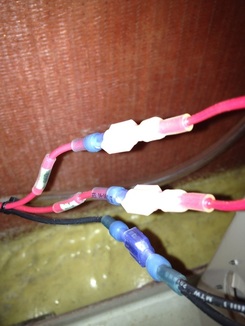
In order to make both the initial installation, but also future maintenance easier, I installed quick-disconnect connectors on the wiring near the gunnel inserts. All connectors were crimped with a quality ratcheting crimp tool and quality heat-shrink terminals were used, with each wire labeled for ease of future identification by myself or some future owner. The wiring for the strips were tied back to a SPDT switch to allow a single switch to either turn on the red or blue lights independently.
In order to make both the initial installation, but also future maintenance easier, I installed quick-disconnect connectors on the wiring near the gunnel inserts. All connectors were crimped with a quality ratcheting crimp tool and quality heat-shrink terminals were used, with each wire labeled for ease of future identification by myself or some future owner. The wiring for the strips were tied back to a SPDT switch to allow a single switch to either turn on the red or blue lights independently.
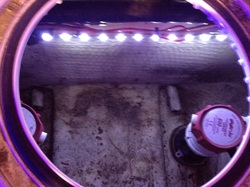
I also wanted to add some lighting in a few dark areas of the boat to make maintenance and service easier. I purchased some 1 foot long white LED strips from another vendor and installed these in a similar manner as above, but in my Electronic Box and two bilge compartments. These provide a lot of light in small areas and are perfect for a dark compartment such as a console, Electronic Box, rod lockers or other similar areas.
All in all this is a fairly easy project which is not very costly and has very "visible" results. Give it a try!
All in all this is a fairly easy project which is not very costly and has very "visible" results. Give it a try!
 |  |
 RSS Feed