One of the long debated topics when it comes to fishing boats is how and where to mount your fish-finder’s
transducer. Often times one has to try several changes (slight) in the mounting position / location in order to get a solid reading when the boat is on plane or at speed. However, making these adjustments, especially when having to do so side-to-side, results in undesired sets of holes in your transom. Even when care is taken to seal these holes, they are opportunities for water to begin to find its way into your transom causing damage down the road.
One way to avoid this issue is to install a transducer mounting plate that you mount to your boat and then you have a surface to mount your transducer to, and if you need to make adjustments you are putting new holes in this mounting plate and not your transom. Starboard or similar HDPE (High Density Polyethylene) materials are popular materials used for marine applications as they will not rot, delaminate or break down in water over time. However, the downside of Starboard or other HDPE materials is that they can be very difficult to bond as very few adhesives will form a bond to the material. Certainly you could screw a block of Starboard to your hull, but you are putting a set of holes in the boat which is what we are trying to avoid, and if those holes are not properly prepared and sealed you can let water in through those. What is needed is a method to secure HDPE-based materials to your hull without the use of screws or other fasteners.
(Click "Read More" to the right for more of this article)
Fortunately there is a method that can be used. With a combination of a specially formulated epoxy, coupled with a little bit of mechanical engineering, you can create an effective bonding system.
Materials needed:
Materials needed:
|
|
| 1. Before starting, if you have previously mounted a transducer you may wish to seal these holes. If you had used 3M 5200 or similar sealant, it is recommended to over drill these holes to remove any of the old sealant and then fill the hole with thickened epoxy. You can use the G-flex epoxy listed above for this use or some other epoxy material such as MarineTex, as these holes will be “top-coated” when we complete our installation. | 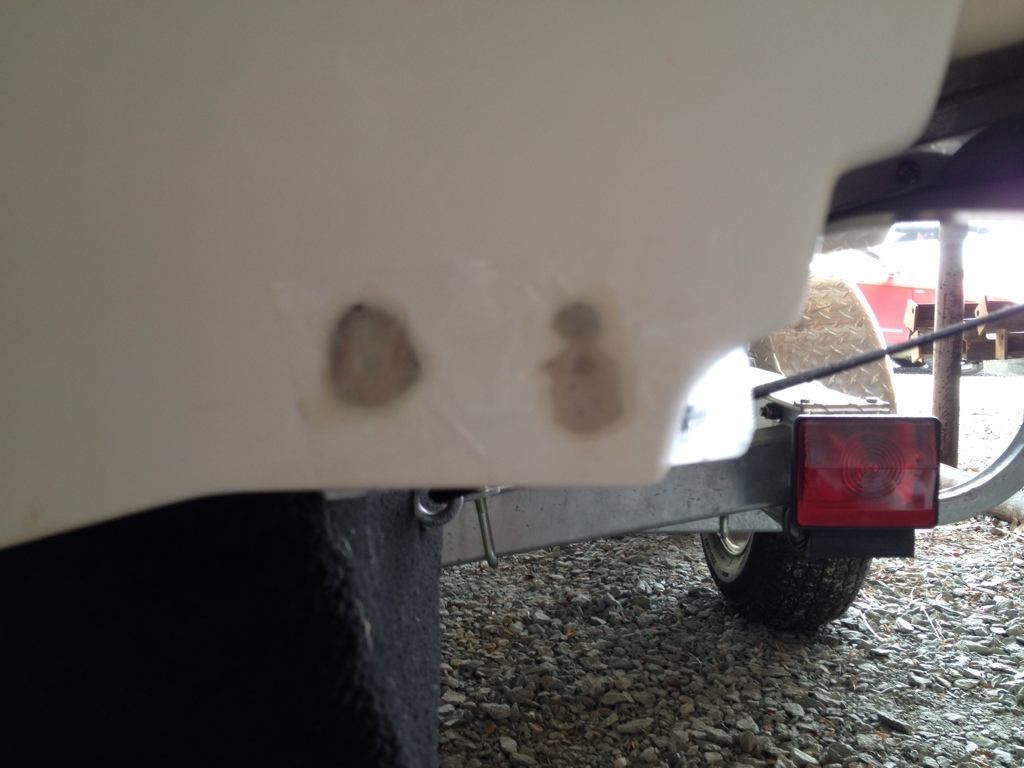 Previous mounting holes ground and drilled clean of previous sealent and filled with epoxy to seal. |
2. Cut the block of Starboard to an appropriate size for your application. Make sure it is wide and tall enough
such that you have the ability to make adjustments vertically and horizontally with your transducer.
3. Drill 4 - 8 evenly spaced holes in the back of your Starboard plate making sure not to drill all the way through - leave approximately 1/8” - 1/4” of material (so if you are using a 3/4” thick block of Starboard, drill 1/2” or 5/8” deep into the back of the block) - make sure to take into account any “point” the dril l might have that may penetrate deeper than the rest of the drill bit.
| 4. Using your Dremel tool and an appropriate bit, create a “dovetail” in the holes you’ve drilled by undercutting the material around the hole. When finished clean up any rough edges with a utility or razor knife. | 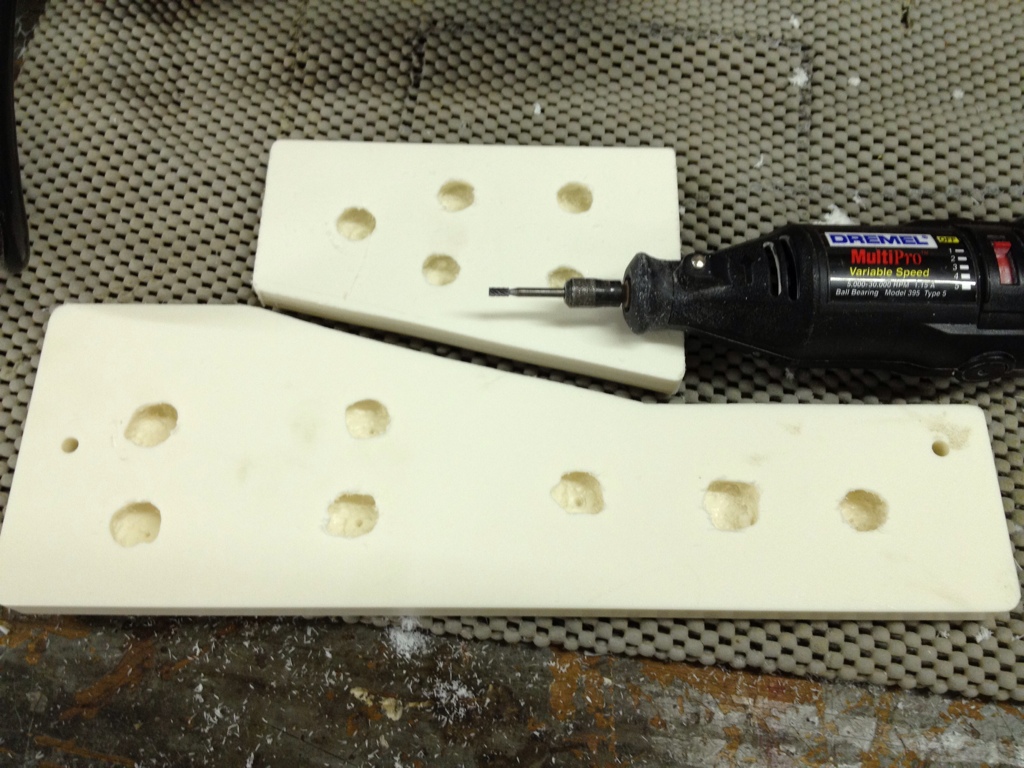 Mounting plates after "dovetails" are back-cut into Starboard using Dremel |
5. Using the 80 grit sand paper, rough up the back of the starboard as well as the gelcoat on your boat where you will be installing the mounting plate.
6. Using the propane torch, flame-treat the rear surface of the mounting plate. This is done by passing the tip of the flame from the torch just above the surface of the material at a rate of around 2”-3” per second, overlapping the previous pass slightly. If done properly you wil l not see any visible difference (no browning, melting, etc), but the heat creates a chemical property change in the material that aids in the bonding. Make sure you complete the next steps within 30 minutes of the flame treatment.
7. Use the clean rag and the acetone or denatured alcohol to thoroughly clean the back of the mounting plate as well as the area of the transom where you will be mounting the plate.
8. Mix the G-flex epoxy per the manufacturer’s directions and then fill the holes in the back of the mounting
plate and if desired apply a thin coat of epoxy across the entire back surface of the plate.
| 9. Apply the mounting plate to the transom and use the masking or painters tape to secure it into position until the epoxy sets. Use the rag and acetone to clean any epoxy that seeps from around the mounting block. | 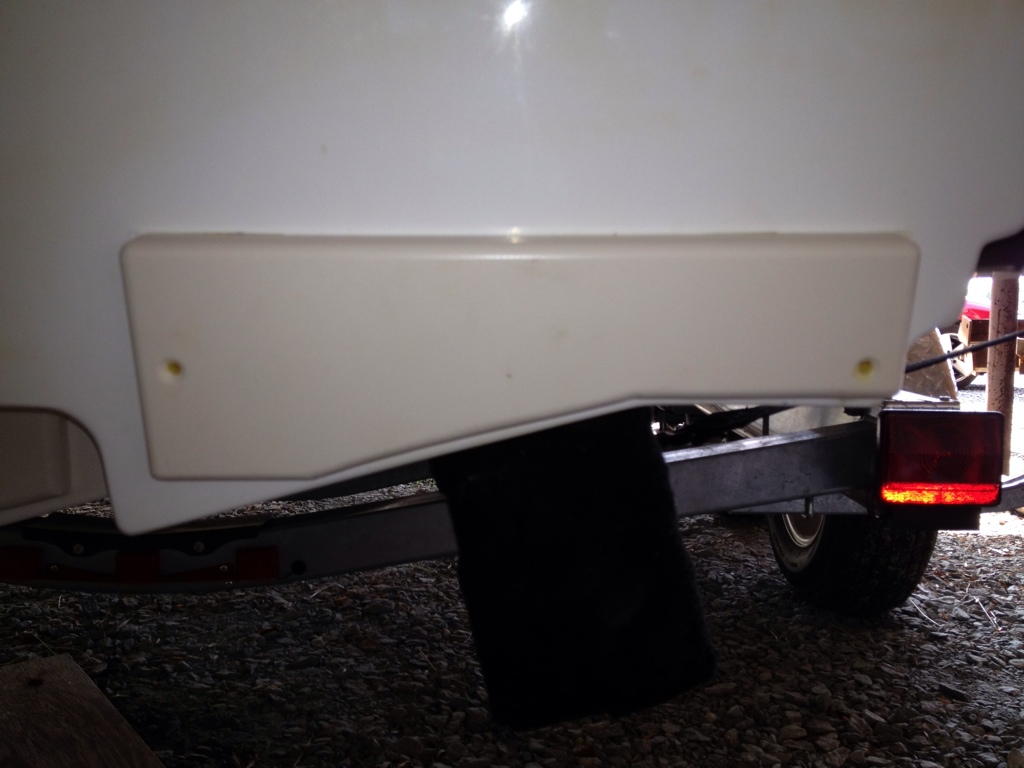 Mounting plate after epoxying with G-flex and the epoxy has set |
10. After 24 hours you can mount your transducer to the mounting plate. Keep in mind the depth of your mounting plate and use screws of an appropriate depth. As you will be using shorter screws than what came with the transducer you may wish to step up a size in diameter if possible or use a broad-threaded screw. Remember - use stainless since these screws will be in the water.
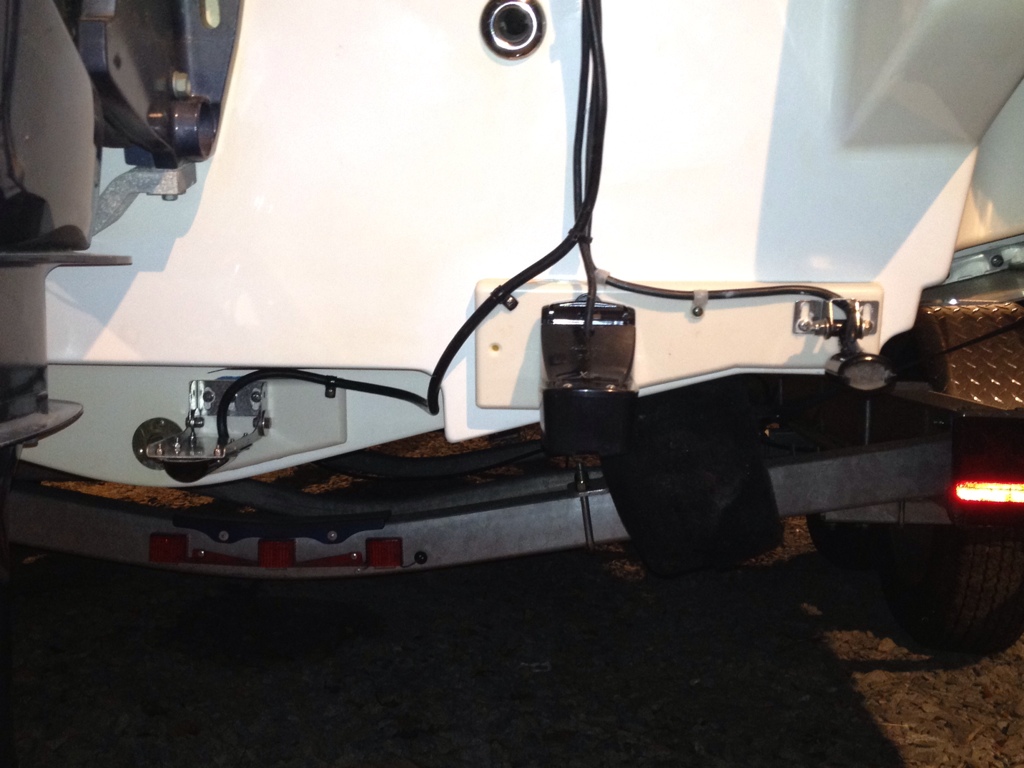
Transduers mounted - Let's go fishing!
You are done!
If you want to take advantage of the mounting system above to avoid holes in your transom, but do not want to go to the trouble of making the mount yourself, you can purchase a commercially made unit. The Stern Saver (www.sternsaver.com) makes a mounting block ready for installation and includes the required amount of adhesive and instructions. There is also a product called “Stern Mate” (www.sternmate.com) which is similar in nature that you may want to explore.
If you want to take advantage of the mounting system above to avoid holes in your transom, but do not want to go to the trouble of making the mount yourself, you can purchase a commercially made unit. The Stern Saver (www.sternsaver.com) makes a mounting block ready for installation and includes the required amount of adhesive and instructions. There is also a product called “Stern Mate” (www.sternmate.com) which is similar in nature that you may want to explore.
 RSS Feed